 |
Language:
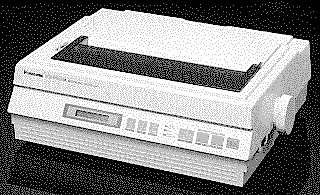
IBM Proprinter X24E, Epson LQ-850 Speed: Draft-Pica 200 CPS, Draft-Elite 240 CPS, Draft-Micron 300 CPS, LQ-Pica 66 CPS, LQ-Elite 80 CPS, LQ-Micron 100 CPS, SLQ-Pica 33 CPS, SLQ-Elite 40 CPS Graphics: 60, 180, 360 DPI No. of Pins: 24 |


Internal Fonts
| Typeface | Quality | Pitches | Highlight |
| Pica | Draft | 10 | Double High |
| Elite | Draft | 10 | Double High |
| Micron | Draft | 10 | Double High |
| Courier | LQ | 12 | Double wide |
| Prestige | LQ | 15* | Double Strike |
| Bold PS | LQ | 17 | Emphasized (Bold) |
| Script | LQ | 20* | Outline |
| Sans Serif | LQ | PS | Shadow |
| Orator | LQ | PS | Underline |
| Roman | LQ | PS | Overline |
* Available in IBM Proprinter X24E mode only through the EZ Set Operator Panel.
Tractor Feed method: Bottom and front pull-tractor feed
Optional Feeders: Cut sheet feeder (Part # KX-P36)
Continuous Feeding
Loading fanfold (pull feed)
1. Turn the power switch on.
2. Make sure that the head gap lever position is appropriate for the thickness of the paper being used.
3. Remove the top cover and open the smoked plastic cover.
4. Set the paper feed select to the "PULL" position. The display briefly shows TRACTOR/PULL.
5. Unlock the tractors by pulling the tractor clamping levers forward. Slide the tractors out toward the sides to the approximate width for the required paper size.
6. Raise the upper tractor covers only and align the center paper support so that it is centered between the tractor.
7. When front feeding, open the paper door on the front of the printer and insert the paper along the paper guides with the side which you wish to print on facing up, until it appears on the platen. When bottom feeding, Push the paper up, with the side which you wish to print on facing up, until it appears on the platen.
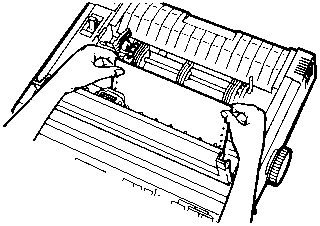
8. Adjust the paper position by pulling it up as shown.
9. Align the paper sprocket
holes with the tractor pins. Verify the paper is straight and
close the upper tractor covers.
10. Adjust the tractor accordingly to remove any slack. Align the paper horizontally by using the marks on the rear cabinet as a guide. Press back on the tractor clamping levers locking the tractors in place.
11. Replace the top cover so that it is totally forward, and close the smoked plastic cover.
12. You can now adjust your Top of Form position or press the [ON LINE] switch to get ready to print.
Manual Feeding
1. Set the paper feed selector so that it is pointing towards the rear of the machine. It will then be positioned next to the picture of the blank page.
2. Position the top cover to the rear of the printer.
3. Open the paper door and begin to insert the paper by using the paper guide. The side on which you wish to print should face up.
4. Continue to guide the paper until you feel resistance.
6. Press the LOAD/PARK switch to load paper to the first print line.
7. To align the paper horizontally or vertically, set the paper feed selector to the "PULL" position. This releases the paper and allows the paper to be positioned manually as required. Set the selector back to the picture of the blank page before printing.

Self test Turn on the printer while holding down the [LF] switch.
Function Mode Press the FUNCTION key to enter function mode the ON LINE light will blink.
Resetting the printer To the factory defaults is best done by taking the battery out of the printer. This will reset the printer to the factory defaults.
Default Settings
| Emulation mode | Epson LQ-850 Italic Character set |
| Default Font | Draft |
| Pitch | 10 cpi |
| Print Direction (Text) | UNI (Unidirectional printing) |
| Print Direction (Graphics) | UNI (Unidirectional printing) |
| Print Width | 8" |
| Panel Lock | OFF |
| Lines/Inch | 6 lpi |
| Character Set | USA |
| Alternative Graphic Mode | OFF (Used in IBM mode only) |
| Auto CR/IBM | OFF (Used in IBM mode only) |
| Buzzer | ON |
| Data Length | 8 bit |
| Paper Out Detector | ON |
| Quite Mode | OFF |
| Reverse Line Feed | OFF (Used in Pull mode only) |
| Tear OFF | Manual |
| Cut Sheet Feeder | OFF |
| Optional RAM | Buffer |
| Display language | English |
The interface connector is located on the back of the printer towards the left side.
Parallel
Availability: Standard
Connection: Centronics
Serial
Availability: Optional
Connection: RS-232C Interface option.