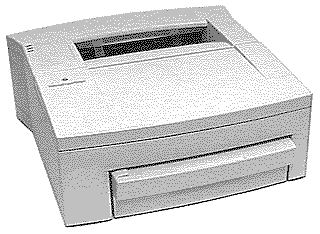
 Personal LaserWriter 300
 Personal LaserWriter 300
 |
Language:
QuickDraw (Full-page Bitmap) Speed: 4ppm Memory: 512K Graphics: 300 dpi Autorotate: N/A Duplex: Not Available RET: Not Available |
Internal Fonts
The Personal LaserWriter 300 uses Bitmap (or TrueType) fonts. The Macintosh sends a Bitmap of each page through the serial connection to the printer. A Bitmap is a dot-by-dot "guide" to each letter or image on the page. It is created in QuickDraw, the Macintosh's internal language.
The following TrueType fonts are shipped with the Personal LaserWriter 300:
| Typeface | Size | Variation | Symbol Set |
| ITC Avant Garde® | Scalable | plain, italic, bold, and bold-italic | Adobe PS |
| ITC Bookman® | Scalable | plain, italic, bold, and bold-italic | Adobe PS |
| Chicago | Scalable | plain | Chicago |
| Courier | Scalable | plain, italic, bold, and bold-italic | Adobe PS |
| Geneva | Scalable | plain | Adobe PS |
| Helvetica® | Scalable | plain, italic, bold, and bold-italic | Adobe PS |
| Helvetica Narrow | Scalable | plain, italic, bold, and bold-italic | Adobe PS |
| Monaco | Scalable | plain | Adobe PS |
| New Century Schoolbook | Scalable | plain, italic, bold, and bold-italic | Adobe PS |
| New York | Scalable | plain | Adobe PS |
| Palatino® | Scalable | plain, italic, bold, and bold-italic | Adobe PS |
| Symbol | Scalable | plain | Symbol |
| Times® | Scalable | plain, italic, bold, and bold-italic | Adobe PS |
| ITC Zapf Chancery® | Scalable | plain | Zapf Chancery |
| ITC Zapf Dingbats® | Scalable | plain | Dingbats |
Unprintable Region
| Letter:
Left: .25 in. Top: .25 in. Right: .25 in. Bottom: .25 in. Legal: Left: .25 in. Top: .25 in. Right: .25 in. Bottom: .25 in. |
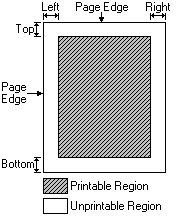 |
Note: Actual imageable area may vary depending on the application program and/or printer driver.
Continuous Feeding
Standard Tray:
100-Sheet Universal Paper Cassette
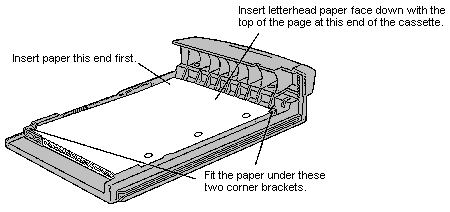
Optional Trays: There are no optional trays for the Personal LaserWriter 300
Loading the paper cassette
The universal paper cassette supplied with your printer holds up to 100 sheets of copier-weight bond paper. The paper size can be U.S. Letter, A4, U.S. Legal, or Executive.
To load the paper cassette:
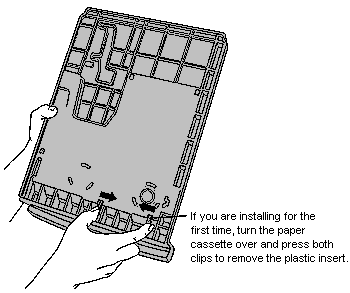
1. Take the cassette out
of the printer and place it on a flat surface.
If you are loading the paper cassette for the first time, remove
the orange cardboard and plastic shipping inserts.
2. Adjust the sliding
backstop in the cassette so it clicks into the notch for the
appropriate paper size.
Be sure the backstop is in one of the notches. Setting it between
notches will result in a printing error.
To change paper size, slide the paper guide in the direction of
the arrow and line up the paper guide pointer with the paper size
you want.
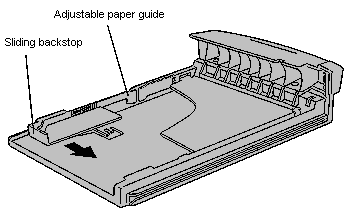
3. Insert a stack of
paper that fits below the top edge of the paper bracket inside
the cassette.

4. Slide the cassette
into the printer.
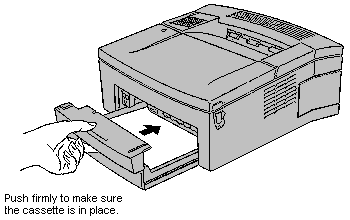
To remove the cassette to refill it, grasp it and pull firmly
straight out.
Manual Feeding
Printing paper or envelopes with the manual feed slot
If you want to use paper that is different from the paper in the cassette, you can use the manual feed slot to insert sheets one at a time as the document is printed. You can also use this slot to print on envelopes and other nonstandard paper sizes.
1. Open the document you want to print or select its icon in the Macintosh Finder.
2. Choose Print from the File menu.
3. In the Print dialog box, choose Manual Feed from the Paper Source pop-up menu.
4. Click Print.
The sheet you inserted is printed. If the document has
additional pages, a message on your screen will alert you each
time a new sheet is needed. To avoid paper jams, always wait for
the prompt before inserting a new sheet.
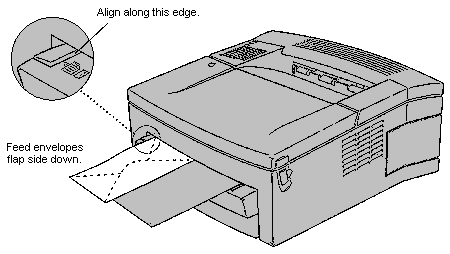
5. Insert a sheet of
paper or envelope as shown. Be sure to keep the page straight so
it feeds correctly.
Printing on both sides of a page
Follow these steps to print a document using both sides of the paper.
1. Print the first side of the page using manual feed or the paper cassette.
2. Take out the printed
sheet, turn it over, and print the second side using manual feed,
inserting the sheet as shown here.
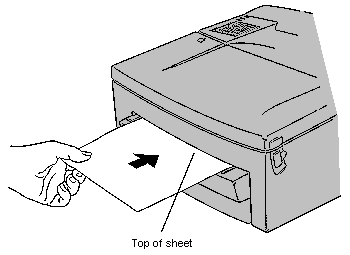
Always use manual feed for printing the second side. To avoid
jams, don't load already printed pages into the paper cassette.
The lights indicate a
problem

Always check the status lights first when a printing problem occurs. These often tell you the cause of the problem.
· The Ready/In Use light should glow steadily whenever the printer is on, and blink when it is printing.
· The Paper Out light is on only when there is no paper in the cassette, or the printer is waiting for manual feed.
· The Paper Jam light is on when any obstruction occurs in the paper path.
The serial connection is
located directly in the center of the base on the back side.
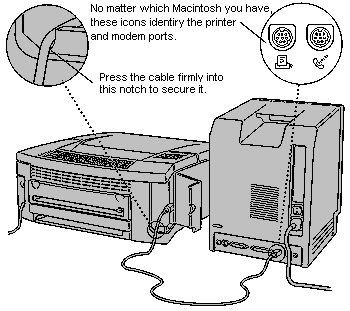
Serial
Availability: Standard
Connection:
Activation: Default