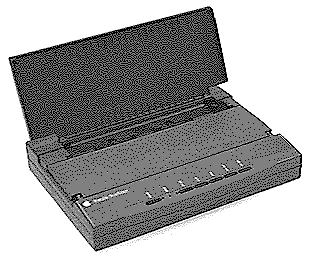
 Portable
StyleWriter
  |
Language:
QuickDraw (Full-page Bitmap) Memory: None Speed: image dependent Graphics: 360, 180 dpi Autorotate: N/A Duplex: Not Available RET: Not Available |
Internal Fonts
The Portable StyleWriter uses Bitmap (or TrueType) fonts. The Macintosh sends a Bitmap of each page through the serial connection to the printer. A Bitmap is a dot-by-dot "guide" to each letter or image on the page. It is created in QuickDraw, the Macintosh's internal language.
The following TrueType fonts are shipped with the Portable StyleWriter:
| Typeface | Size | Variation | Symbol Set |
| Times | Scalable | plain, bold, italic, bold-italic | Adobe PS |
| Helvetica | Scalable | plain, bold, italic, bold-italic | Adobe PS |
| Courier | Scalable | plain, bold, italic, bold-italic | Adobe PS |
| Symbol | Scalable | plain | Symbol |
Unprintable Region
| Letter:
Left: .25 in. Top: .25 in. Right: .25 in. Bottom: .25 in. Legal: Left: .25 in. Top: .25 in. Right: .25 in. Bottom: .25 in. |
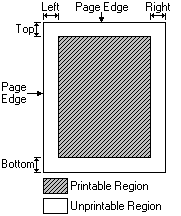 |
Note: Actual imageable area may vary depending on the application program and/or printer driver.
Continuous Feeding
Standard Tray: Single
Sheet feeder
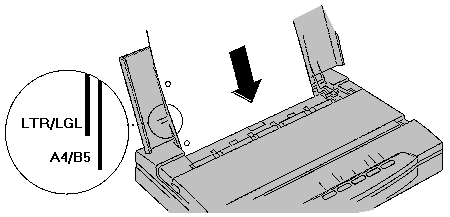
Optional Trays: The Portable StyleWriter supports an Optional Sheet Feeder (M1736G/A)
Manual Feeding
1. Stand the printer up and
open the top cover.
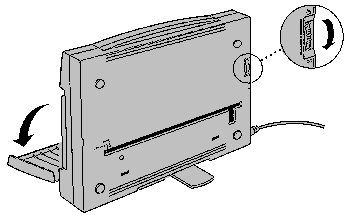
Make sure that the paper thickness adjustment dial is set to the
envelope icon.
2. Insert an envelope or
sheet into the slot in the back of the printer.
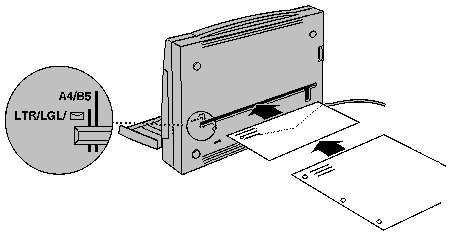
The printer prints on the side of the envelope or sheet that
faces up. Align the side of the envelope or sheet with the
indicators on the open cover. Use the LTR/LGL/Envelope indicator
for #10 envelopes and letter- or legal-size material. Use the
A4/B5 mark for A4- or B5-size material.
Load each transparency with a clean sheet of paper underneath.
3. Press the LF/FF button.
The paper advances into position. You can adjust its position by
pressing the FWD ADJ (Forward Adjust) and REV ADJ (Reverse
Adjust) buttons. Each time you press one of the buttons, the
paper moves a bit forward into the printer or back out of the
printer
4. The On Line light goes on. The printer is ready to print.
The Status Lights
indicate a problem

The lights on the Portable StyleWriter (together with the pattern of beeps you hear from the printer) can indicate a number of problems. Use the table below to identify problems indicated by the lights on the printer.
| Power Light | On Line Light | Error Light | Error Description |
| Off | Off | Off | The power adapter is not correctly connected or the printer is not turned on. |
| On | Off | On | (The printer beeps two or three times.) The printer is out of paper (or no paper has been loaded). |
| On | Off | On | (The printer beeps continuously.) Paper is jammed, or paper longer than 15 inches has been loaded. |
| On | Off | Blinks | (The printer beeps continuously.) The ink cartridge has not returned to its home position. turn off the printer, wait a few seconds, then turn it on again. |
| On | Blinks | Off | (The printer beeps 5 times.) An error occurred while the printer started up. Turn off the printer, wait a few seconds, then turn it on again. |
| On | Blinks | Blinks | (The printer beeps 3 times.) An error occurred in the printer. Turn off the printer, wait a few seconds, then turn it on again. |
| Blinks | Off | Off | (The Power light blinks once every second.) The battery is being charged. |
| Blinks | Off | Off | (The Power light blinks once every half a second.) The battery is low. |
| Blinks | Off | On | (The printer beeps 5 times, and the Power light blinks once every half a second. After 5 minutes, the printer beeps again, then turns off automatically.) The battery has run out of power. |
| Blinks | Off | Blinks | (The printer beeps 5 times, and the two lights blink alternately.) There is a problem with the battery. Charge the batter two or three times. If the problem continues, replace the battery with a new one. |
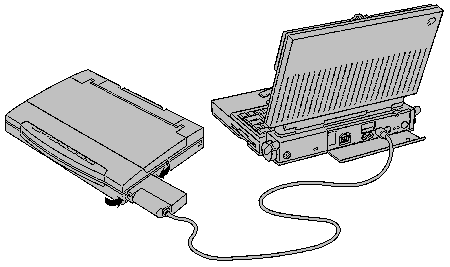
Before you connect the
Portable StyleWriter to your Macintosh, make sure that the
computer and the printer are both turned off. Then use the
interface cable that came with the Portable StyleWriter to
connect the printer to the computer as shown.
Availability: Standard
Connection: Centronics-type 8-bit parallel
Activation: Default
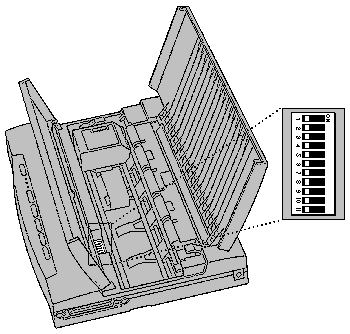
Location of DIP Switches
When your printer's carrier
cover is removed and the type head is at the far left, you can
see the two DIP switch assemblies in the bottom of the machine at
the right. They are covered with a flap of clear plastic.
DIP Switch Settings
The normal position of all DIP switches on the Portable StyleWriter is Off. If you install the optional sheet feeder, you must set switch 1 to the On position. To change a switch position, use the point of a pen to push the switch.