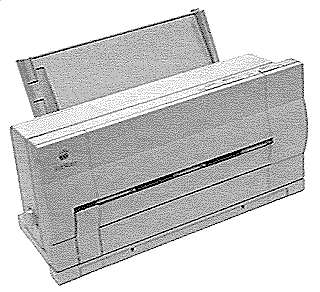
 ® StyleWriter
  |
Language:
QuickDraw (Full-page Bitmap) Speed: Normal 1/2ppmFaster 1ppm Memory: None Graphics: 360, 180 dpi Autorotate: N/A Duplex: Not Available RET: Not Available |
Internal Fonts
The StyleWriter uses Bitmap (or TrueType) fonts. The Macintosh sends a Bitmap of each page through the serial connection to the printer. A Bitmap is a dot-by-dot "guide" to each letter or image on the page. It is created in QuickDraw, the Macintosh's internal language.
The following TrueType fonts are shipped with the StyleWriter and LaserWriter LS:
| Typeface | Size | Variation | Orientation | Symbol Set |
| Times | Scalable | Any variation the software supports | N/A | Adobe PS |
| Helvetica | Scalable | Any variation the software supports | N/A | Adobe PS |
| Courier | Scalable | Any variation the software supports | N/A | Adobe PS |
| Symbol | Scalable | Any variation the software supports | N/A | Symbol |
Unprintable Region
| Letter:
Left: .25 in. Top: .25 in. Right: .25 in. Bottom: .25 in. Legal: Left: .25 in. Top: .25 in. Right: .25 in. Bottom: .25 in. |
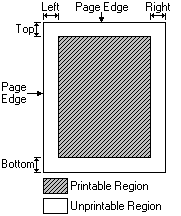 |
Note: Actual imageable area may vary depending on the application program and/or printer driver.
Continuous Feeding
Standard Tray:
Automatic 50-sheet paper feeder
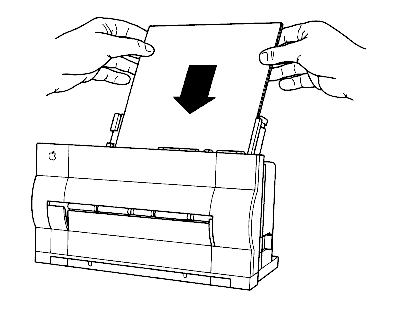
Optional Trays: There are no optional trays available for the StyleWriter
Manual Feeding
The StyleWriter comes with
two manual feed slots
 --one
in the rear and one in the front of the printer.
· To print on materials such as envelopes and labels, use the rear slot. Materials printed this way follow a relatively straight path through the printer, and you're more likely to be satisfied with manual feed reliability.
· To print on standard paper, you can use the front slot for easy access. (You can also print on any standard sheet of paper using the rear slot.)
Printing with the sheet feeder removed
If you have elected to remove the sheet feeder from the StyleWriter printer, you still have the option of inserting paper through the front or rear manual feed slots.
· To use the front slot (for standard paper only), follow the procedure described in the preceding section, "Standard Paper."
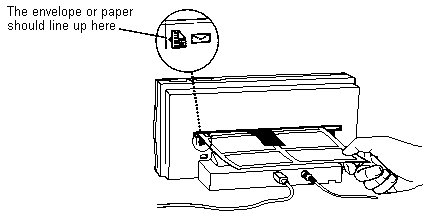
· If you use the rear slot, the illustration below shows you how to align the material correctly. Otherwise, the procedure is the same as the one described in "Envelopes, Transparencies, Labels, and Heavy Paper," earlier in this chapter.
Envelopes, transparencies, labels, and heavy paper
Use the rear manual feed slot for #10 envelopes, transparencies, sheets of labels, and heavy paper (weights greater than 24-lb.). Before you print, you need to make several adjustments.
1. Open the front access door.
2. Change the forms thickness setting.
3. Close the front access door.
4. Choose Page Setup from the File menu.
The Page Setup dialog box appears.
5. Choose Print from the File menu.
6. In the Print dialog box that appears, click Manual.
7. Press the Ready button to turn off the Ready light.
Until you have correctly inserted the envelope or paper into the manual feed slot, the printer is not ready to print.
8. Insert the envelope or paper as far as it will go.
Insert envelopes top first, address side up.
Insert sheets of labels, transparencies, or paper top first and face up. (For recommended printing materials, see Appendix B, "Specifications and Parts List.")
9. Make sure the envelope or paper is lined up correctly.
If the envelope or paper is crooked at all, release it and repeat step 8.
10. With the material correctly loaded, press the Ready button to turn on the Ready light.
11. Click OK in the dialog box on your screen
Printing begins. In a few moments your printed item appears.
Standard paper
Although you can hand-feed standard paper (weights between 16 and 24 lb.) through the rear slot, you may find the front slot more accessible. Do not use the front slot to print on envelopes, transparencies, or labels; use the rear slot instead.
1. If necessary, change
the forms thickness setting.
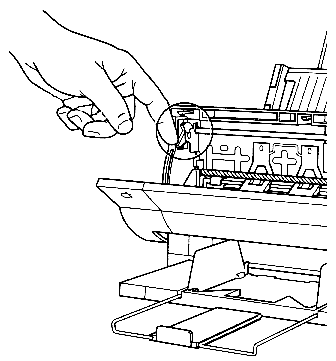
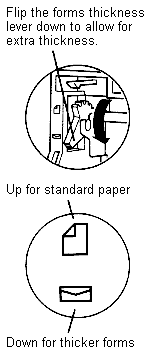
If you've been printing envelopes or other thick forms, you must
change the setting to accommodate standard paper.
2. Open the manual feed guide.
3. Choose Print from the File menu.
4. In the Print dialog box that appears, click Manual.
5. Press the Ready button to turn off the Ready light.
The printer is not ready to print until you have started the sheet of paper through the manual feed slot.
6. Insert the sheet of paper as far as it will go.
7. Holding the paper positioned in the slot, press and release the Form Feed button.
8. Make sure the paper is lined up correctly.
If the paper is crooked, release it. Then repeat steps 6 and 7.
9. Press the Ready button to turn on the Ready light.
10. Click OK in the dialog box on your screen.
The Status Lights
indicate a problem

Sometimes the status lights can signal a problem with the printer. The following list describes these indications and tells you what you should do about them:
· All lights are off. Check to make sure the AC adapter power cord is plugged in properly and the printer is turned on. Make sure there is power to the outlet in your home or office. If the light stays off, the AC adapter may have failed. Contact your authorized Apple dealer and describe the situation.
· The Power Error lights blink when the Ready light is off. The carriage (containing the ink cartridge) is jammed. Turn off the power and remove any paper that obstructs the free movement of the carriage. When you turn the printer on again, only the Power and Ready Lights should be on.
· The Power Light is on, and the Error and Ready lights blink. Paper is jammed. Locate and remove the paper, then press the Ready button. If the Ready light and Power light begin to glow steadily {and the Error light is off}, you've fixed the problem.
· The Error light glows steadily. Either the printer is out of paper or paper has been misfed. If the printer's out of paper, see "Loading Paper into the Sheet Feeder" in Chapter 3. If paper has been misfed, see "Paper is Jammed" and "Paper Feeds Improperly" earlier in this chapter.
The serial connection is
located directly in the center of the base on the back side.
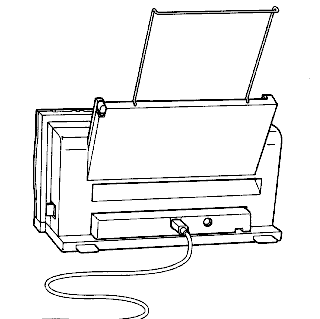
Availability: Standard
Connection: High-speed Serial; Apple System/Peripheral-8 cable
Activation: Default