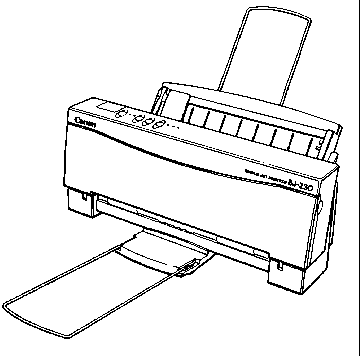
 |
Language:
IBM Proprinter, Epson ESC/P Speed: 173 CPS - Letter, 248 CPS - Draft, 124 CPS - Super High Quality Graphics: 360 x 360 DPI Color: No |
Internal Fonts
| Typeface | Pitches (BJ-10/IBM mode) | Pitches (Epson LQ mode) |
| Prestige | 12 cpi in high quality mode only | 10, 12, 15, 17, 20, proportional |
| Courier | 10, 12, 17, proportional | 10, 12, 15, 17, 20, proportional |
| San Serif | Not Available | 10, 12, 15, 17, 20, proportional |
| Draft | Not Available | 10, 12, 15, 17, 20, proportional |
| Roman | Not Available | 10, 12, 15, 17, 20, proportional |
| Script | Not Available | 10, 12, 15, 17, 20, proportional |
| Orator | Not Available | 10, 12, 15, 17, 20, proportional |
| Orator-S | Not Available | 10, 12, 15, 17, 20, proportional |
Unprintable Regions
Left: .25 inch
Right: .25 inch
Top: .50 inch
Bottom: .30 inch
Continuous Feeding
Standard Feeders: One Paper Tray [capacity: 100 sheets or 10 envelopes
Envelope Feeding
1. Make sure the printer is turned on and On-Line.
2. Turn on the envelope mode
by pressing and holding the LF/FF button, and then pressing the
ON LINE button. The beeper will sound once and the indicator
light for the current print mode will blink. Press ON LINE to set
the printer back On-Line.

3. Make sure the green paper
thickness lever on the inside of the printer is set to the right.
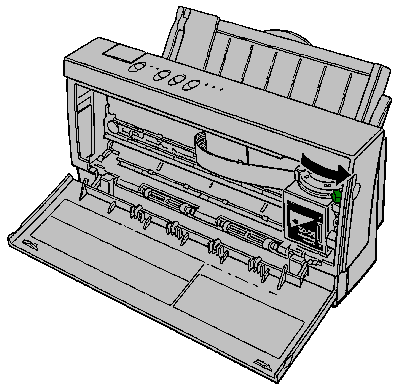
4. Set the paper selection
lever to the forward position and move the paper guide to the
left to match the envelope's width.
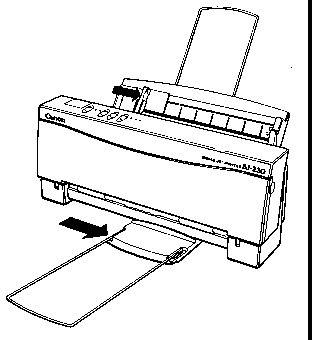
5. Arrange the stack of envelopes on a firm surface and press down firmly on the edges to make the folds crisp. Press all the way around the envelopes to remove any curls and expel air from inside the envelopes.
6. Align the stack of
envelopes with the right edge of the sheet feeder, and slide in
the stack until it stops.
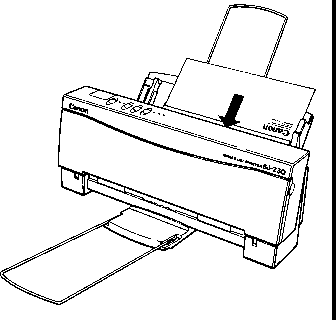
7. Adjust the paper guide to the stack of envelopes.
8. Print from your application.
After printing on envelopes, follow these steps before printing on normal paper again:
1. Set the paper selection lever (on the right side of the sheet feeder) to the back position.
2. Set the green paper thickness lever (inside the printer) to the left position.
3. Disable the envelope mode. To do this, make sure the printer is On-Line; then press and hold the LF/FF button and press the ON LINE button.
| Keypad Display | Cause | Solution |
| On-Line, HS and HQ lights blinking | RAM/ROM error | Press the Power button to turn off the printer.Wait 15 seconds, and press the Power button again to turn on the printer. If the problem is cleared, the On-Line indicator will blink for a few seconds and then light steadily, and the printer head will move to the home position. If the HS and HQ indicators continue to blink, call the Canon help desk at 1-800-423-2366. |
| Error light is on | Paper error | Check the sheet feeder. If the printer is out of paper, load paper into the sheet feeder and press On line to continue printing.Check the printer for a paper jam. If a paper jam has occurred, clear it. |
The printer functions defined by the DIP switches are determined by the printer control mode. DIP switch 12 selects the printer control mode. When DIP switch 12 is OFF, the printer is in BJ-10 mode; when DIP switch 12 is on, the printer is in Epson LQ mode.
BJ-10 Mode
Horizontal print position
Letter or envelope ![]()
![]()
![]()
![]()
![]()
![]()
![]()
![]()
![]()
![]()
![]()
![]()
![]()
![]()
A4 ![]()
![]()
![]()
![]()
![]()
![]()
![]()
![]()
![]()
![]()
![]()
![]()
![]()
![]()
Text Scale Mode
Disabled ![]()
![]()
![]()
![]()
![]()
![]()
![]()
![]()
![]()
![]()
![]()
![]()
![]()
![]()
Enabled ![]()
![]()
![]()
![]()
![]()
![]()
![]()
![]()
![]()
![]()
![]()
![]()
![]()
![]()
Reduction Mode
Disabled ![]()
![]()
![]()
![]()
![]()
![]()
![]()
![]()
![]()
![]()
![]()
![]()
![]()
![]()
Page Length
11 inches ![]()
![]()
![]()
![]()
![]()
![]()
![]()
![]()
![]()
![]()
![]()
![]()
![]()
![]()
12 inches ![]()
![]()
![]()
![]()
![]()
![]()
![]()
![]()
![]()
![]()
![]()
![]()
![]()
![]()
Character Set
Set 1 ![]()
![]()
![]()
![]()
![]()
![]()
![]()
![]()
![]()
![]()
![]()
![]()
![]()
![]()
Set 2 ![]()
![]()
![]()
![]()
![]()
![]()
![]()
![]()
![]()
![]()
![]()
![]()
![]()
![]()
Automatic Carriage Return
Normal LF ![]()
![]()
![]()
![]()
![]()
![]()
![]()
![]()
![]()
![]()
![]()
![]()
![]()
![]()
LF with CR ![]()
![]()
![]()
![]()
![]()
![]()
![]()
![]()
![]()
![]()
![]()
![]()
![]()
![]()
Alternate Graphics Mode
Disabled ![]()
![]()
![]()
![]()
![]()
![]()
![]()
![]()
![]()
![]()
![]()
![]()
![]()
![]()
Enabled ![]()
![]()
![]()
![]()
![]()
![]()
![]()
![]()
![]()
![]()
![]()
![]()
![]()
![]()
Not Used Not Used ![]()
![]()
![]()
![]()
![]()
![]()
![]()
![]()
![]()
![]()
![]()
![]()
![]()
![]()
Code Page
437 ![]()
![]()
![]()
![]()
![]()
![]()
![]()
![]()
![]()
![]()
![]()
![]()
![]()
![]()
850 ![]()
![]()
![]()
![]()
![]()
![]()
![]()
![]()
![]()
![]()
![]()
![]()
![]()
![]()
Buffer Size
Input:49kb, DL:0kb ![]()
![]()
![]()
![]()
![]()
![]()
![]()
![]()
![]()
![]()
![]()
![]()
![]()
![]()
Input:9kb, DL:40kb ![]()
![]()
![]()
![]()
![]()
![]()
![]()
![]()
![]()
![]()
![]()
![]()
![]()
![]()
Not Used Not Used ![]()
![]()
![]()
![]()
![]()
![]()
![]()
![]()
![]()
![]()
![]()
![]()
![]()
![]()
Epson LQ Mode
Horizontal Print Position
Letter or envelope ![]()
![]()
![]()
![]()
![]()
![]()
![]()
![]()
![]()
![]()
![]()
![]()
![]()
![]()
A4 ![]()
![]()
![]()
![]()
![]()
![]()
![]()
![]()
![]()
![]()
![]()
![]()
![]()
![]()
Text Scale Mode
Disabled ![]()
![]()
![]()
![]()
![]()
![]()
![]()
![]()
![]()
![]()
![]()
![]()
![]()
![]()
Enabled ![]()
![]()
![]()
![]()
![]()
![]()
![]()
![]()
![]()
![]()
![]()
![]()
![]()
![]()
Reduction Mode
Not Used ![]()
![]()
![]()
![]()
![]()
![]()
![]()
![]()
![]()
![]()
![]()
![]()
![]()
![]()
Page Length
11 inches ![]()
![]()
![]()
![]()
![]()
![]()
![]()
![]()
![]()
![]()
![]()
![]()
![]()
![]()
12 Inches ![]()
![]()
![]()
![]()
![]()
![]()
![]()
![]()
![]()
![]()
![]()
![]()
![]()
![]()
Character Set
Italics ![]()
![]()
![]()
![]()
![]()
![]()
![]()
![]()
![]()
![]()
![]()
![]()
![]()
![]()
Graphics ![]()
![]()
![]()
![]()
![]()
![]()
![]()
![]()
![]()
![]()
![]()
![]()
![]()
![]()
International Character Set
USA ![]()
![]()
![]()
![]()
![]()
![]()
![]()
![]()
![]()
![]()
![]()
![]()
![]()
![]()
United Kingdom ![]()
![]()
![]()
![]()
![]()
![]()
![]()
![]()
![]()
![]()
![]()
![]()
![]()
![]()
Germany ![]()
![]()
![]()
![]()
![]()
![]()
![]()
![]()
![]()
![]()
![]()
![]()
![]()
![]()
France ![]()
![]()
![]()
![]()
![]()
![]()
![]()
![]()
![]()
![]()
![]()
![]()
![]()
![]()
Denmark ![]()
![]()
![]()
![]()
![]()
![]()
![]()
![]()
![]()
![]()
![]()
![]()
![]()
![]()
Sweden ![]()
![]()
![]()
![]()
![]()
![]()
![]()
![]()
![]()
![]()
![]()
![]()
![]()
![]()
Italy ![]()
![]()
![]()
![]()
![]()
![]()
![]()
![]()
![]()
![]()
![]()
![]()
![]()
![]()
Spain ![]()
![]()
![]()
![]()
![]()
![]()
![]()
![]()
![]()
![]()
![]()
![]()
![]()
![]()
Typeface
Roman ![]()
![]()
![]()
![]()
![]()
![]()
![]()
![]()
![]()
![]()
![]()
![]()
![]()
![]()
Sans serif ![]()
![]()
![]()
![]()
![]()
![]()
![]()
![]()
![]()
![]()
![]()
![]()
![]()
![]()
Draft ![]()
![]()
![]()
![]()
![]()
![]()
![]()
![]()
![]()
![]()
![]()
![]()
![]()
![]()
Courier ![]()
![]()
![]()
![]()
![]()
![]()
![]()
![]()
![]()
![]()
![]()
![]()
![]()
![]()
Prestige ![]()
![]()
![]()
![]()
![]()
![]()
![]()
![]()
![]()
![]()
![]()
![]()
![]()
![]()
Script ![]()
![]()
![]()
![]()
![]()
![]()
![]()
![]()
![]()
![]()
![]()
![]()
![]()
![]()
Orator ![]()
![]()
![]()
![]()
![]()
![]()
![]()
![]()
![]()
![]()
![]()
![]()
![]()
![]()
Orator-S ![]()
![]()
![]()
![]()
![]()
![]()
![]()
![]()
![]()
![]()
![]()
![]()
![]()
![]()
The interface connection is
located on the back of the printer.
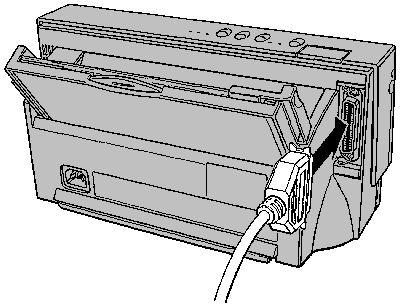
Parallel
Availability: Standard
Connection: Centronics Female
Activation: Automatic