 |
Language:
IBM Proprinter, Epson ESC/P Speed: 346 CPS - black, 173 CPS - color Graphics: 720 x 360 DPI B&W, 360 x 360 DPI color Color: Yes |


Internal Fonts
| Typeface | Pitches (BJC-10/IBM mode) | Pitches (Epson LQ mode) |
| Prestige | 10, 12, 17, proportional | 10, 12, 15, 17, 20, proportional |
| Courier | 10, 12, 17, proportional | 10, 12, 15, 17, 20, proportional |
| Gothic | 10, 12, 17, proportional | 10, 12, 15, 17, 20, proportional |
| Draft | 10, 12, 17, proportional | 10, 12, 15, 17, 20, proportional |
| Roman | 10, 12, 17, proportional | 10, 12, 15, 17, 20, proportional |
| Script | 10, 12, 17, proportional | 10, 12, 15, 17, 20, proportional |
Unprintable Regions
Left: .25 inch
Right: .25 inch
Top: .12 inch in BJ mode, .39 in Epson mode (.87 recommended)
Bottom: .12 inch (.87 recommended)
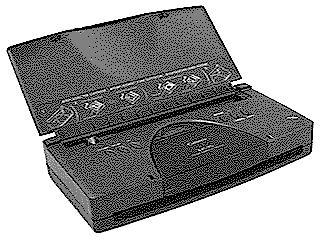
Continuous Feeding
Standard Feeders: Built-in Sheet Feeder [capacity: 30 sheets or 5 envelopes]
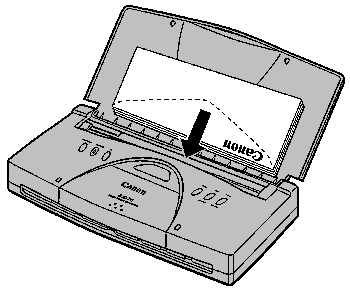
1. Make sure the paper
support is open.
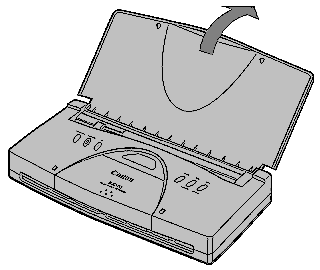
2. Fan the paper.
3. Slide the stack of paper
into the printer until it stops. Align the edge of the paper with
the right edge of the sheet feeder. Insert the paper so that the
side you want to print on is facing you. If you are using a
preprinted stock, such as letterhead, insert the top of the paper
into the sheet feeder first.
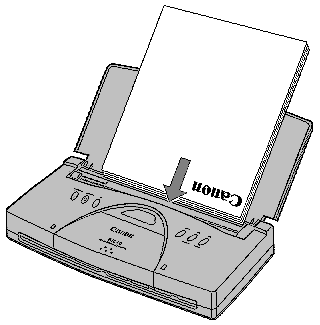
4. Adjust the paper guide to the stack of paper.
Envelope Feeding
1. Make sure the paper support is open and move the paper guide to the left to match the width of the envelopes.
2. Prepare the envelopes. Arrange the stack of envelopes on a firm surface and press down firmly on the edges to make the folds crisp. Press around the envelopes to remove any curls and expel air from inside the envelopes.
3. Insert the envelopes.
Make sure the side you want to print on is facing you and the
flap is toward the paper support. Insert the top of the envelope
first. Slide the envelope(s) into the sheet feeder until it
stops. Align to the right of the sheet feeder.
4. Adjust the paper guide to the stack of envelopes.
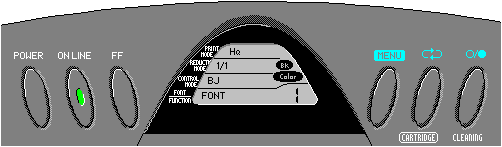
| Display | Cause | Solution |
| Blinking C and 5 | Low battery notice | Press
the On Line button to set the printer back on-line. You
can print again. Be sure to plug your AC adapter into the printer as soon as printing is complete. Otherwise the printer detects a low battery notice condition again and eventually the printer may stop operating. If you leave the printer in low battery notice condition for more than five minutes, the printer turns off automatically. |
| Blinking C and 6 | Automatic cartridge change completion | Press
the On Line button to set your printer back on-line. if you neglect to press the Cartridge button when you change a BJ cartridge or an ink tank, the printer returns the cartridge holder to its home position automatically in order to prevent the print head from drying out. The printer notifies you that this has occurred by alternately flashing C and 6 in the display. |
| Blinking Bk or Color indicator | Ink low notice | If the Bk indicator blinks, the printer is running low on black ink; if the Color indicator blinks the printer is running low on color ink. Make sure a new ink tank is available. If you continue printing, the printer will run out of ink and you will have printing problems, such as white streaks. Cleaning the print head will not help. Replace the ink tank with a new one. |
| Blinking E and 1 | No paper error | After adding paper to the sheet feeder, press the FF button to feed paper or press the on line button to set the printer on-line. |
| Blinking E and 2 | Paper jam error | After removing the jammed paper from the printer, press the On Line button. |
| Blinking E and 6 | BJ cartridge not properly installed error | The BJ cartridge may not be installed or may be installed incorrectly. Press the cartridge button to move the cartridge holder to the center and check that the BJ cartridge is installed. If the cartridge is not installed, install one. If installed, remove it and try installing it again. |
| Blinking F and C | Low battery error | The printer can no longer operate on battery power. Turn off the printer, and plug the AC adapter or the universal adapter into the printer, or replace the battery pack with a charged one. Then turn the printer on again. You can start the print operation again. However, any data sent from your software application will be lost. |
| Blinking C and 1 | Service Error | Press the On Line button. The printer resumes operation. Contact your Canon authorized dealer as soon as possible, |
| Blinking F and 14 | Service Error | Contact your Canon authorized dealer as soon as possible. |
| Blinking F and other number | Other service call errors | If you see a message consisting of the letter F in combination with a number (such as F1 or F2) and the printer beeps for about five seconds, turn the printer off and reconnect your AC adapter. If this does not cause the printer to stop beeping, make a note of the message number and call your local Canon authorized dealer. |
The interface connection is
located on the back of the printer.
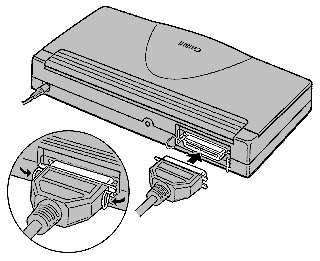
Parallel
Availability: Standard
Connection: Centronics Female
Activation: Automatic