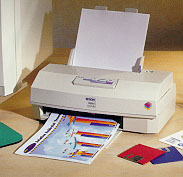
 Stylus Color
II
Stylus Color
II
 |
Language:
Epson ESC/P2, IBM X24 Speed: 5.5 MPP
Graphics:
60,180,360, 720*dpi(only with special paper)
Color Inkjet
Technology
|


Internal Fonts
| Typeface |
Quality |
Height |
Pitch |
| Draft |
Draft |
7 pt |
15 CPI |
| Draft |
Draft |
10.5
pt |
10 or
12 CPI |
| Courier |
LQ |
7 pt |
15 CPI |
| Courier |
LQ |
10.5
pt |
10 or
12 CPI |
| Roman |
LQ |
7 pt |
15 CPI |
| Roman |
LQ |
10.5
pt |
10 or
12 CPI or Proportional |
| Sans
Serif |
LQ |
7 pt |
15 CPI |
| Sans
Serif |
LQ |
10.5
pt |
10 or
12 CPI or Proportional |
| Prestige |
LQ |
10.5
pt |
10 or
12 CPI |
| Script |
LQ |
10.5
pt |
10 or
12 CPI |
| Script
C |
LQ |
10.5
pt |
Proportional |
| Roman
T |
LQ |
Scaleable
from 8 pt to 32 pt in 2 pt increments |
Proportional |
| Sans
Serif H |
LQ |
Scaleable
from 8 pt to 32 pt in 2 pt increments |
Proportional |
Continuous Feeding
Standard Feeder: 100
sheets
Loading paper in the paper
feeder
- Set the paper thickness
lever on the right side of the sheet feeder. There are
two settings: plain paper and thick paper. Set the lever
to the position that best suits the paper or other media
you plan to use:

| Paper
type |
Paper
thickness lever position |
| Standard
paper |
Plain paper |
| Transparency
film |
Plain paper |
| Envelopes |
Thick paper |
- Set the thickness
adjustment lever for your media type. To access the
lever, open the printer cover; the lever is in the left
back corner.

| Paper
type |
Thickness
adjustment lever position |
| Standard
paper |
0 |
| Transparency
film |
0 |
| Envelopes |
+ |
| Previously
smeared documents |
+ |
- Lower the output tray
at the front of the printer, then slide out the
extension.

- Slide the left edge
guide on the sheet feeder to the left as far as it will
go.

- Fan a stack of paper;
then tap it on a flat surface to even the edges.
- Load the stack of
paper, printable side up, so that its right edge is
firmly against the right side of the sheet feeder. (Do
not load paper above the arrow printed on the inside of
the left edge guide on the sheet feeder.) Then slide the
left edge guide against the left edge of the paper.

Loading Envelopes
Do not use envelopes that
are curled or folded, or ones that are too thin; they may curl
during printing. Also, do not choose 720 dpi resolution for
envelope printing.
- Make sure to set the
paper thickness and thickness adjustment levers to the
correct positions for envelopes. See steps 1 and 2 above.
- You can load up to 10
envelopes in the sheet feeder with the printable side
facing up.
- Adjust the left edge
guide so the envelopes feed straight into the paper path.
- Change the printer
driver settings so they are appropriate for the envelopes
you loaded.
Single Button Functions
- Alt
- Used in combination
with other buttons to rest the printer, clean the print
heads, or replace the ink cartridges.
- Pause (or Reset)
- Stops printing
temporarily. Press it again to resume.
- Economy/Condensed (or
Cleaning)
- Selects economy or
condensed mode as indicated by the Economy and
Condensed lights. Us this button only if you
print from a DOS application.
- Print Mode (or
Cleaning)
- Selects the paper and
ink type when using DOS. The current setting is indicated
by the left and right Print Mode lights:
| Paper
type |
Left
light |
Right
light |
| Plain paper
(true black) |
Off |
Off |
| Plain paper
(composite black) |
Off |
On |
| Coated or
glossy paper |
On |
Off |
| Transparency
film |
On |
On |
For most printing on
plain paper, select Plain paper (true black). If the
black ink on the printout is blurred, select Plain paper
(composite black). Composite black is produced by mixing
cyan, magenta and yellow ink.
- Load/Eject
- Loads or ejects a sheet
of paper. The printer normally loads and ejects paper
automatically.
Button Combinations and
power-on functions
- Alt + Pause (or Reset)
- Clears the printer's
buffer and resets the printer settings to their factory
defaults.
- Alt + Economy/Condensed
- Cleans the black print
head.
- Alt + Print Mode
- Cleans the color print
head.
- Load/Eject + POWER
switch
- Checks the paper length
and performs a printer self test.
- Load/Eject + Print Mode
+ POWER switch
- When connected to a PC,
prints a page containing a hexadecimal representation of
the data sent to the printer (hex dump) for printing. To
exit hex dump mode, press the Pause button and turn off
the printer.
- Alt + POWER switch
- Prints a demonstration
page of the printer's fonts and colors. (Paper must be
loaded in the printer). To exit demonstration mode, press
the Pause button and turn off the printer.
- Economy/Condensed +
POWER switch
- Enters the printer's
Default setting mode; see the next section for more
information; To exit Default setting mode, press the
Pause button and turn off the printer.
- Pause + POWER switch
- Enters printer
adjustment mode and prints a multilingual instruction
sheet on calibrating the printer. (Paper must be loaded.
Use this mode only if you are printing from DOS
applications. To exit printer adjustment mode, press the
Pause button and turn off the printer.
Using the Default Setting
mode
Additional printer functions
are available through the Default setting mode. Because the
printer's factory defaults are designed to meet the needs of
almost all users, you rarely need to change the printer functions
listed below. If necessary, however, you can turn on the Default
setting mode and change the settings using the control panel
buttons.
To turn on Default setting
mode and print instructions, turn off the printer. Then hold down
the Economy/Condensed button while you turn the printer back on.
Follow the instructions the printer prints to change the default
settings by pressing the buttons on the control panel. When you
are finished, press Pause and turn off the printer to exit
Default setting mode.
Default setting mode
functions:
- Print Direction
- Specifies how the print
head moves across the page. The options are Uni-D, Bi-D
and Auto (default). When Uni-D is on, the print head
prints in only one direction to provide the most precise
alignment for graphics and text. In Bi-D printing, the
print head prints in both directions. Bi-D is faster but
the vertical alignment may not be as precise as Uni-D.
When Auto is selected, the printer switches automatically
between Uni-D and Bi-D as necessary when it receives
data.
- Font and Pitch
- Select the built-in
printer font and character pitch used as the default.
Normally you use your software to select the font and
pitch. The default Font and Pitch is Courier 10 CPI
(characters per inch).
- Interface Mode
- Determines from which
interface the printer receives print data. The default
setting, Auto, allows the printer to automatically switch
as needed between the parallel and serial interfaces.
However, if you experience communication problems, you
might want to set the interface mode to either Parallel
or Serial.
- Auto interface wait
time
- Sets the time period
for the printer to wait for data from the current
interface (and accept no data from the other interface)
when you're using the Auto interface mode. You can select
a 10-second (default) or 30-second timeout.
- Software
- Specifies the printer
control language to use: Epson ESC/P2 (default) or IBM
X24/X24E. If your software allows you to select Epson
ESC/P2, choose it for the most advanced fonts and
graphics.
- Auto CR
- Specifies that the
printer perform a carriage return and line feed operation
if the print positions exceed the right margin of the
paper. (Used in IBM X24/X24E mode only).
- AGM (Alternate Graphics
Mode)
- Specifies that the
printer use high-resolution, 24-pin graphics commands.
(Used in IBM X24/X24E mode only).
- Character table
- Selects the set of
characters and symbols that can be printed. The default
is the Italic USA character table. If you commonly use a
language containing accents, symbols or other characters
not available in the Italic USA character table, change
to a different character table.
- Auto line feed
- Specifies that a
carriage return character encountered in the print file
be accompanied by a line feed command. By default, auto
line feed is off. If text lines print on top of one
another, turn on auto line feed.
- Network interface mode
- If you're having
trouble printing when the printer is connected to
multiple computers, turn on network interface mode. By
default, network interface mode is off.
- Loading position
- Determines the top
margin by defining how close to the paper edge the first
line can print. The lading position can be 3 mm (default)
or 8.5 mm. Normally you should use your software to
adjust your top margin.
- Thick paper
- Select Index card
(portrait) or Envelope (default) if you print on these
media.

Parallel
Availability:
Standard
Connection:
Centronics Female
Activation: Default
Auto
Serial
Availability:
Standard
Connection: RS-422
(Macintosh)
Activation: Default
Auto
