 DeskJet
340 C2655ADeskJet
340 C2655A
DeskJet
340 C2655ADeskJet
340 C2655A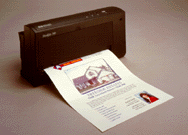 |
Language:
PCL Level 3 Speed: 2 pages per minute text, 4-7 minutes per page color graphics Graphics: 600 x 300dpi best black, 300 x 300 best color |


Hewlett-Packard DeskJet 340 Fonts
Internal Fonts
| Typeface | Orientation | Heights | Pitches | Styles | Weights |
| Courier | Portrait | 6, 12 | 5, 10, and 20 | Upright, Italic | Medium, Bold |
| Courier | Portrait | 6, 12 | 16.67 | Upright | Medium, Bold |
| Courier | Landscape | 6, 12, 24 | 10, 16.67, and 20 | Upright | Medium, Bold |
| CG Times | Portrait | 5, 6, 7, 8, 10, 12, 14 | proportional | Upright, Italic | Medium, Bold |
| Letter Gothic | Portrait | 6, 12 | 6, 12, 24 | Upright, Italic | Medium, Bold |
| Letter Gothic | Landscape | 6, 12, 24 | 12, 24 | Upright | Medium, Bold |
| Letter Gothic | Landscape | 4.75, 9.5, 19 | 16.67 | Upright | Medium, Bold |
| Univers | Portrait | 5, 6, 10, 12 | proportional | Upright, Italic | Medium, Bold |
| Univers | Portrait | 7, 8, 14 | proportional | Upright | Medium, Bold |
Unprintable Regions
Left & Right: 0.25" Letter, Legal and Executive, 0.13" A4
Top: 0.25" all sizes
Bottom: 0.63" all sizes
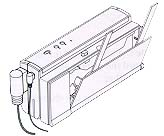
Standard Feeders: Portable Sheet Feeder [capacity: 25 sheets]
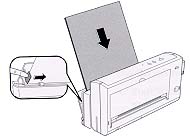
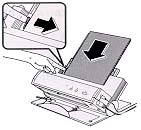
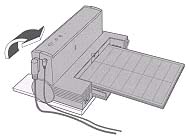
Loading Paper into the Portable Sheet Feeder

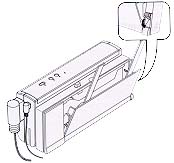
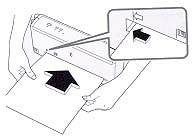
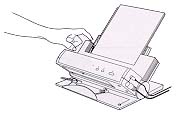
Manually Feeding Single Sheets without a sheet feeder
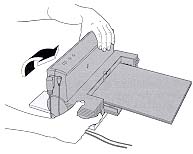
You may find that the paper you have loaded into the portable sheet feeder is not feeding well into the printer. In such cases you may wish to remove the portable sheet feeder and try feeding each sheet by hand.
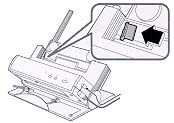
Optional Desktop Sheet Feeder Part# C3005A
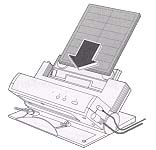
Loading Paper
Loading Labels
To print labels when using the desktop sheet feeder, the printer must be vertical so that the labels can move straight through.
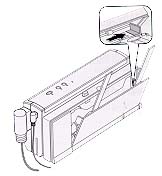
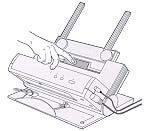
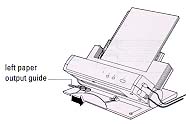
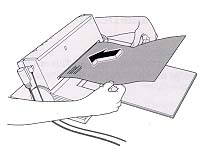
Feeding Paper Manually While Desktop Sheet Feeder is Installed
To print a page on paper that is different from the paper already in the desktop sheet feeder, you can use the manual feed position. Make sure that you select manual feed as the paper source in your software before printing. NOTE: Envelopes are not supported on the DeskJet 340.

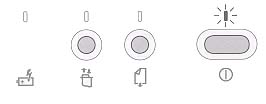
In some routine printing situations, you will see one of the lights blinking.
| Green Power Light | The printer is busy. You don't need to do anything. |
| Amber Paper Feed Light | The printer is out of paper or paper is not properly loaded. |
| Amber Charge Light | The battery charge level is low. |
| Amber Change Cartridge Light | The ink cartridge needs to be changed or is not properly installed. |
If the Charge light blinks alternately with the other lights the printer is indicating a problem with the battery.
If all four lights are blinking at the same time, there may be a problem with the printer itself. To check if there is a problem, turn the printer off and then back on again. Make sure any print jobs have been cancelled in your software.
If the lights are still blinking:
| Paper light is on | Paper is jammed in the printer. |
| Change Cartridge light is on. | The movement of the print cartridge may be blocked. |
| Change Cartridge and Paper Feed lights are on. | Open the access door and gently push or tap the print cartridge and print cartridge cradle against the end of the printer. |
| Paper Feed and Power lights are on. | An internal printer error has occurred. Try turning the printer off and back on. If the error does not clear, return the printer for service. |
| Change Cartridge and Power lights are on. | An internal printer error has occurred. Try turning the printer off and back on. If the error does not clear, return the printer for service. |
| Change Cartridge, Paper Feed and Power lights are on. | Return the printer for service. |
Parallel
Availability: Standard
Connection: Centronics Female
Activation: Automatic
Serial (Macintosh)
Availability: Standard
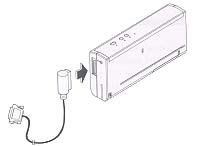
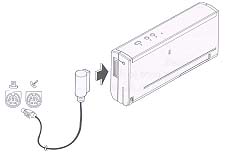
Connection: Must use special cable to connect Macintosh serial port to printer Centronics port. HP part# C3279A (US & Asia-Pacific) #C3278A (Europe).
Activation: Automatic
Infrared
Availability: Optional Adapter, HP Part# C3277A
Connection: Wireless IrDA-compliant infrared port
Activation: Automatic